If you haven’t already, be sure to pair your FOB with the printer you are trying to use. You will be prompted to enter your NetID and password. If you are using a Ricoh printer, you will have the option to scan your card or enter your NetID and password.
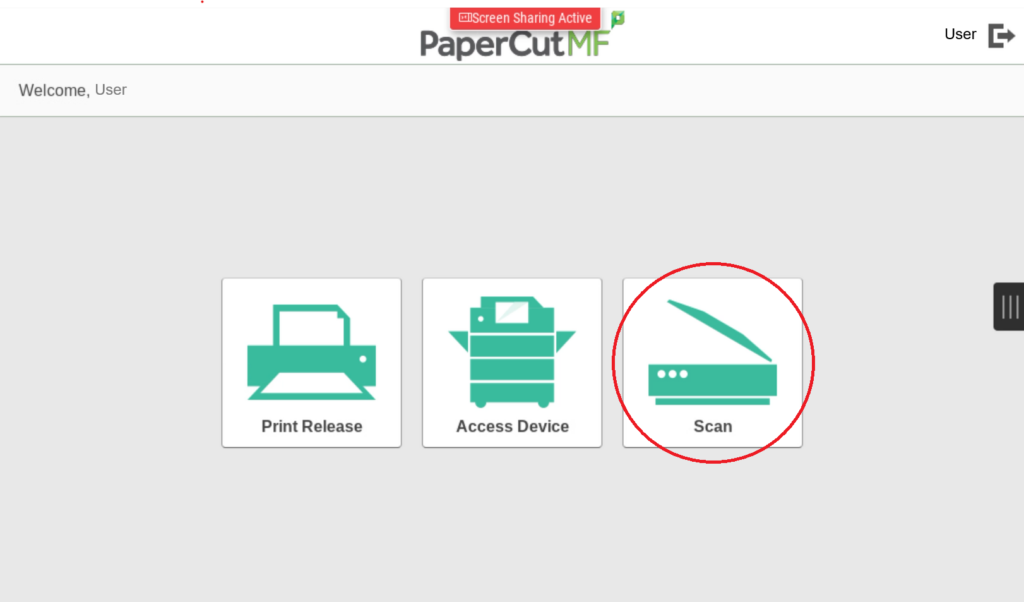
1
From the Home menu, select 'Scan'
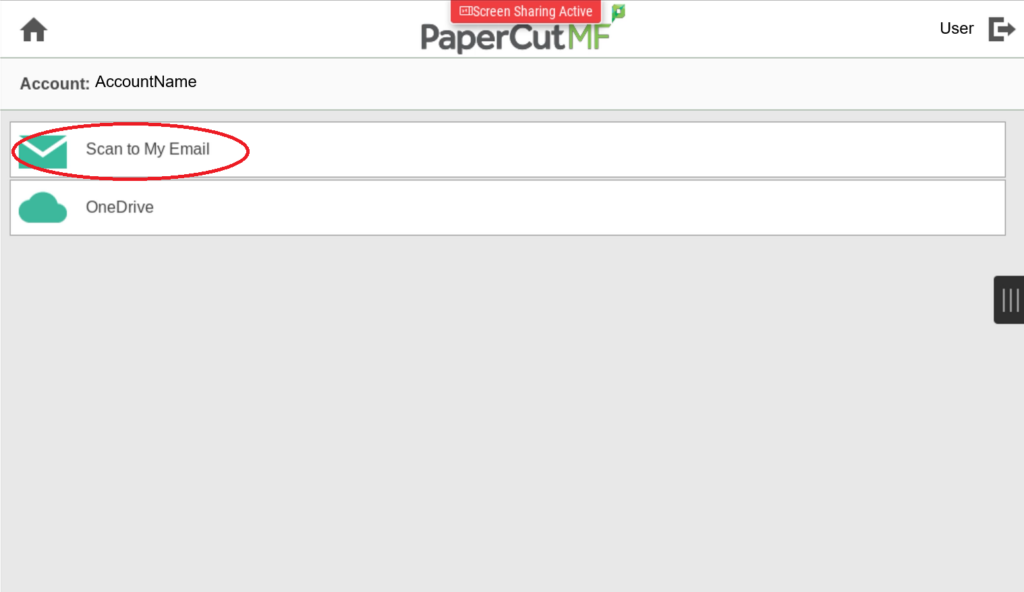
2
Select 'Scan to My Email'
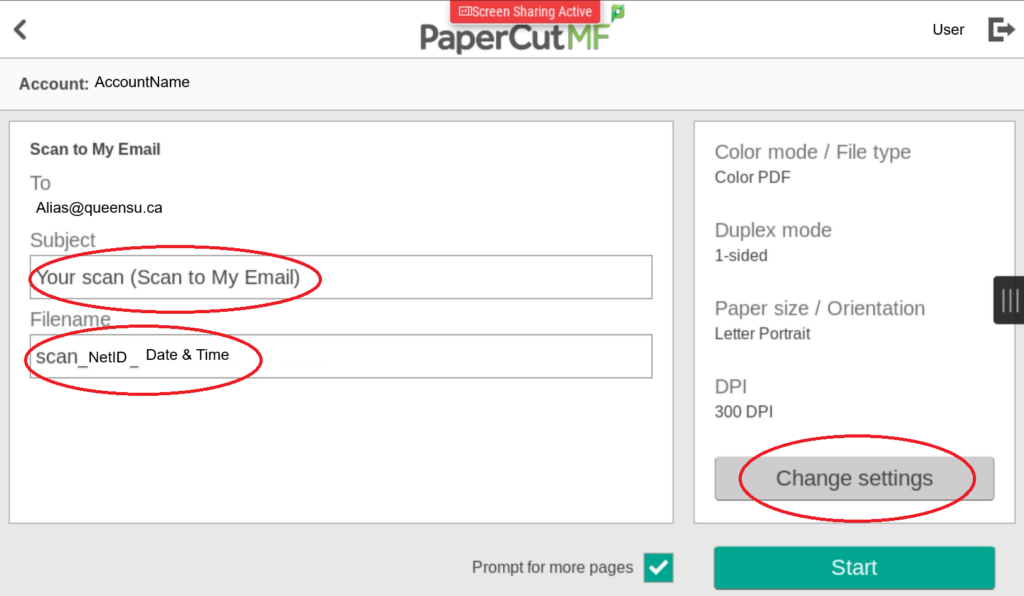
3
Change your Settings and Start the Scan.
Please note, you can only scan to your email, not other peoples.
You can change the File Name, Email Subject line and go into ‘Change Settings’ for additional options.
Once you are done changing your settings, click ‘Start’
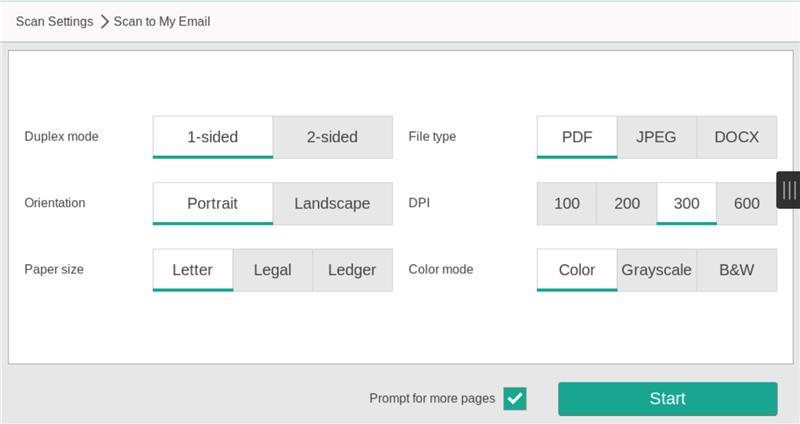
4
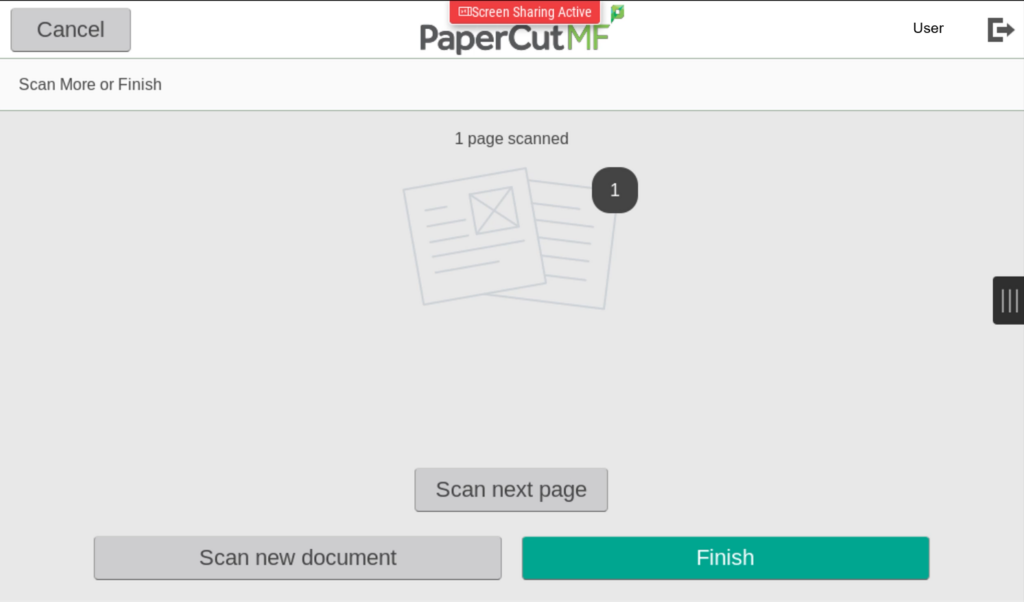
Either Continue Scanning, or hit 'Finish'
Once you select ‘Finish’ you should get an email from papercut@appsci.queensu.ca notifying you that your scanned document is being sent. The document itself will be addressed from yourself with the subject line you scanned the document with.