Please Note!This is currently the only verified work around that enables users to print Crowdmark exams themselves. The following method of printing Crowdmark booklets requires several stages of manual input from the user. It is strongly recommended that you use the University operated exam printing program as a first resort. Details are sent out by the Exams Office to Faculty each term. Please be mindful of submission deadlines.
1
Generate Booklets
In Crowdmark, create your assessment, set up the template, and generate the unique, QR-coded PDF booklets.
2
Download PDF
Download the finalized, ready-to-print PDF file containing all student booklets.
3
Split your Crowdmark PDF document
Before you Begin:Have your Crowdmark document saved to a new or empty folder as this method of printing will generate multiple files. Additionally, please note that this method of printing can work with any printer that has a finisher and stapling capabilities.
In order for your crowdmark document to be printed and stapled into individual exam booklets, the cumulative PDF will need to be split.
From Adobe Acrobat:
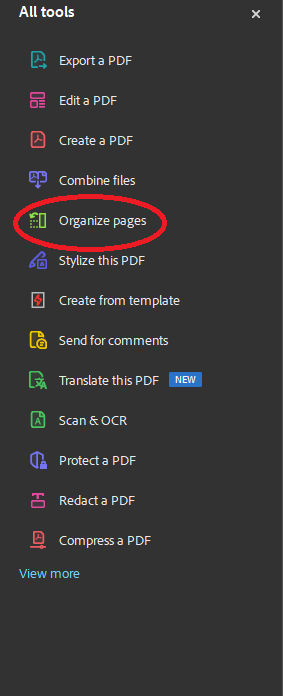
1. From the ‘All Tools’ sidebar, select ‘Organize Pages’.
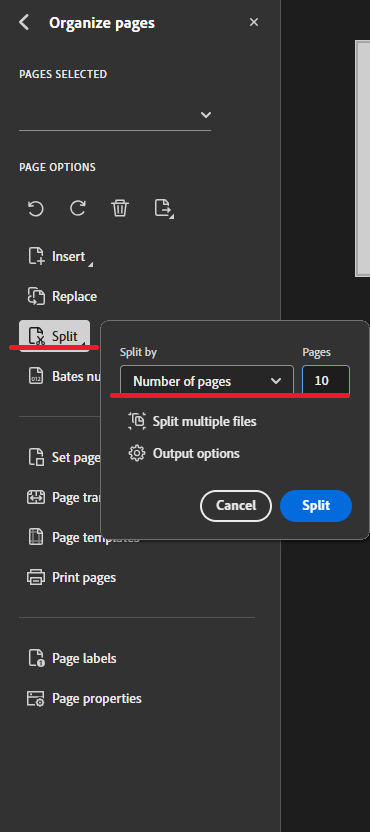
2. Next, click ‘Split’, then modify the ‘Split by’ values. For instance, if your booklets are 10 pages each, split by 10 pages.
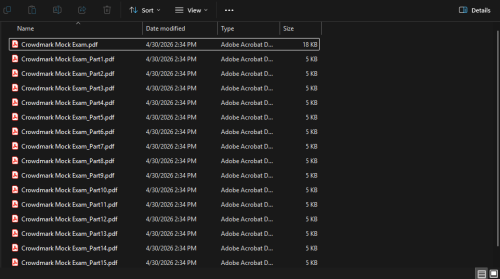
3. Once the split is done, individual PDFs will be generated for each booklet. They will be named ‘filename_Part1’, etc.
4
Set Default Printer
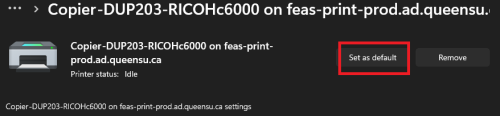
Change your default printer to the one you will use to print the Crowdmark booklets.
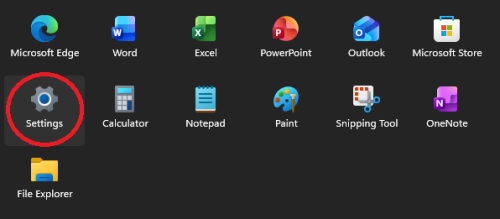
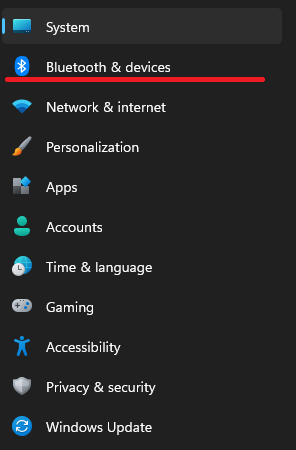
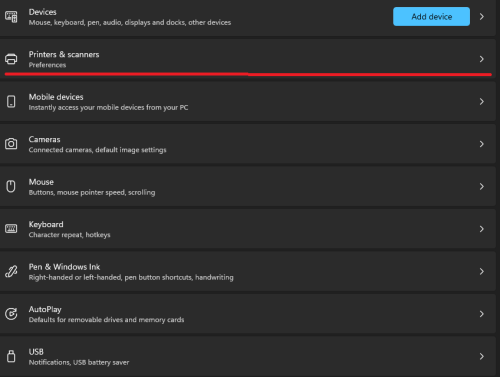
Go to Settings –> Bluetooth & Devices –> Printers & scanners.
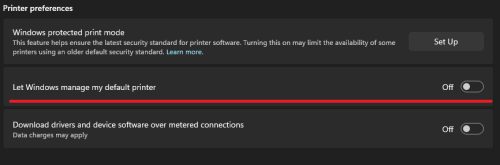
In ‘Printers & Scanners’, scroll down to ‘Printer preferences’ and ensure ‘Let Windows manage my default printer’ is toggled off.
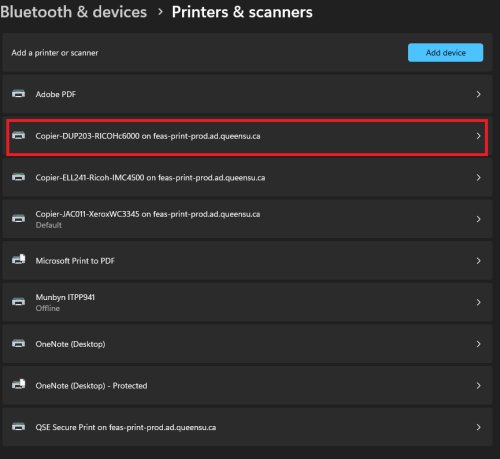
Scroll back up and select the printer you would like to use (your printer’s name may differ). In the next menu, select ‘Set as default’.
5
Configure Print Settings
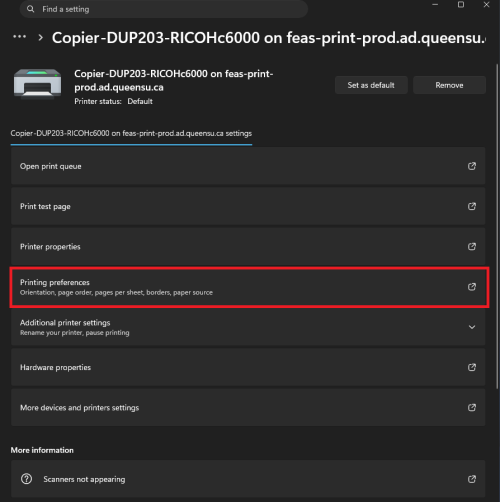
While in the settings for your selected default printer, click on ‘Printing Preferences’ to pull up the menu to configure your print settings.
Necessary Printing Settings:
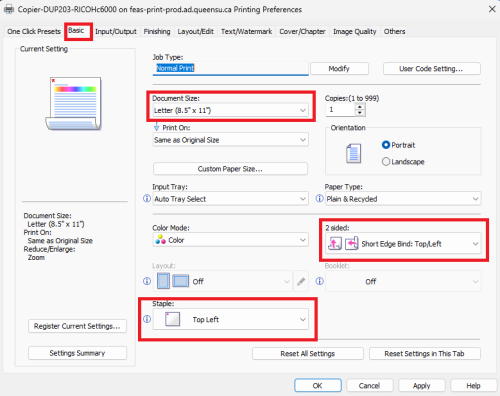
2 sided: Essential to ensure the QR codes align properly and prevent students from writing on blank backs. You can choose between short Edge and Long Edge bind (the printer will default to Long Edge).
Document Size: Use 8.5″ x 11″ (Letter) or A4 paper to match the template.
Staple: Select the option that best suits how you want the booklets stapled. This feature defaults to ‘Off’, so be sure to select an option.
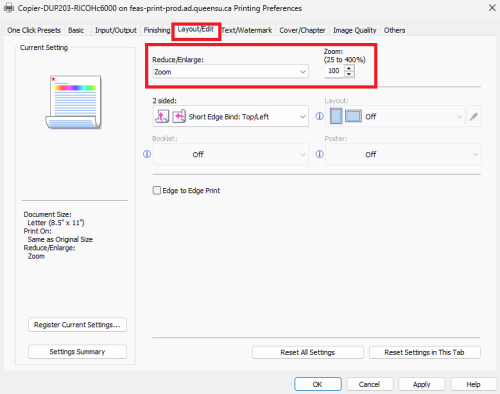
Layout/Edit: Under Reduce/Enlarge, select “Zoom: 100%”. Do not use “Fit to paper size,” as it may resize the QR codes and prevent proper scanning.
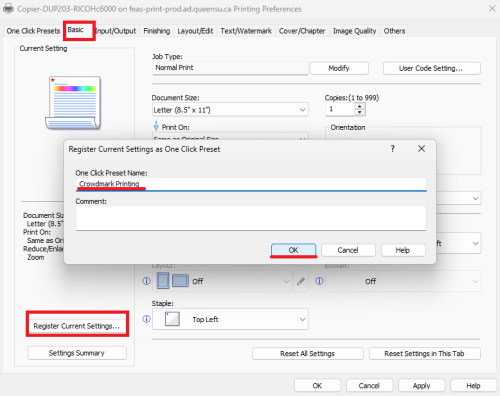
Once you are done making the necessary changes to your printing settings, click ‘Register Current Settings’ to save your Crowdmark printing configuration.
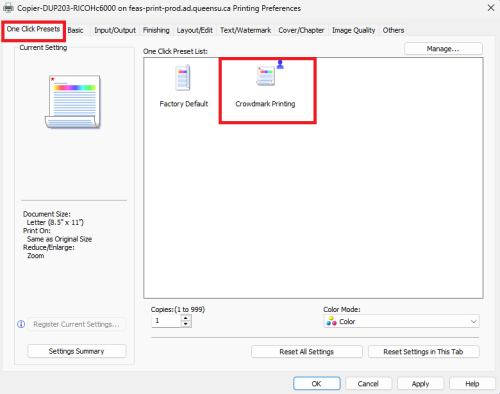
In the future, you can then go to ‘One Click Presents’ and select your Crowdmark printing settings from your list of printing configurations.
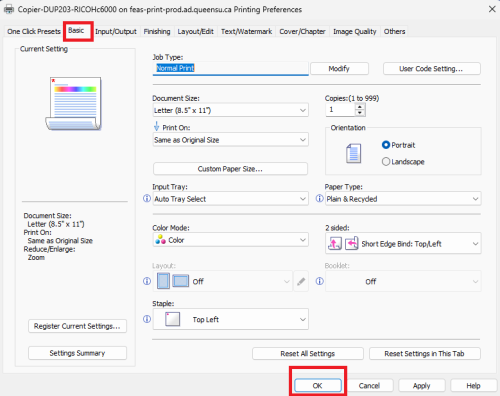
Make sure to select ‘OK’ at the bottom of the ‘Basic’ tab to apply your printing configuration changes. If you do not, the printer will default back to a normal print job. Conversely, ensure you switch back to a normal print job after you are finished with your Crowdmark printing.
6
Printing your Booklets
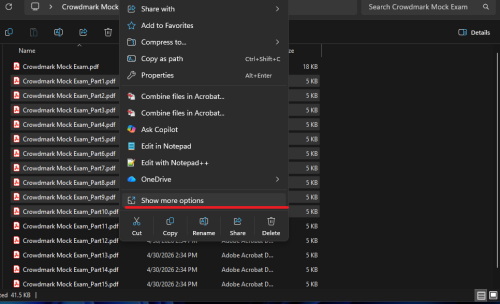
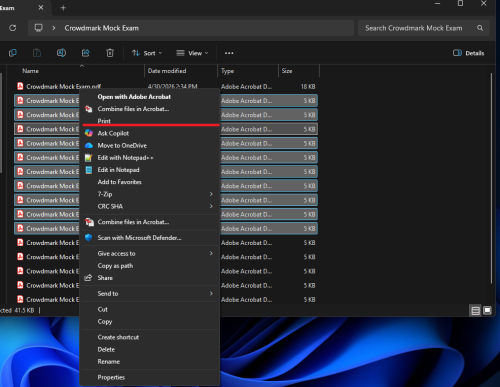
Select your individual booklet files and right-click. Select ‘Show more options’.
In the next menu, click ‘print’.
Please note, depending on the size of your files, you may only be able to print up to 10 booklets at once.
Continue to select and print batches of booklets until they are all printed.